OpenAI Integration (Python)
If you use the OpenAI Python SDK, you can use the Langfuse drop-in replacement to get full logging by changing only the import.
- import openai
+ from langfuse.openai import openai
1. Setup
The integration is compatible with OpenAI SDK versions >=0.27.8. It supports async functions and streaming for OpenAI SDK versions >=1.0.0.
%pip install langfuse openai --upgradeimport os
# Get keys for your project from the project settings page
# https://cloud.langfuse.com
os.environ["LANGFUSE_PUBLIC_KEY"] = ""
os.environ["LANGFUSE_SECRET_KEY"] = ""
# Your openai key
os.environ["OPENAI_API_KEY"] = ""
# Your host, defaults to https://cloud.langfuse.com
# For US data region, set to "https://us.cloud.langfuse.com"
# os.environ["LANGFUSE_HOST"] = "http://localhost:3000"2. Replace import
# instead of: import openai
from langfuse.openai import openai
# checks the SDK connection with the server.
from langfuse.openai import auth_check
auth_check()Attributes
Instead of setting the environment variables before importing the SDK, you can also use the following attributes after the import. This works for the async OpenAI client as well:
| Attribute | Description | Default value |
|---|---|---|
openai.langfuse_host | BaseUrl of the Langfuse API | LANGFUSE_HOST environment variable, defaults to "https://cloud.langfuse.com". Set to "https://us.cloud.langfuse.com" for US data region. |
openai.langfuse_public_key | Public key of the Langfuse API | LANGFUSE_PUBLIC_KEY environment variable |
openai.langfuse_secret_key | Private key of the Langfuse API | LANGFUSE_SECRET_KEY environment variable |
# Instead of environment variables, you can use the module variables to configure Langfuse

# openai.langfuse_host = '...'
# openai.langfuse_public_key = '...'
# openai.langfuse_secret_key = '...'

# This works for the async client as well
# from langfuse.openai import AsyncOpenAI
3. Use SDK as usual
No changes required.
Optionally:
- Set
nameto identify a specific type of generation - Set
metadatawith additional information that you want to see in Langfuse
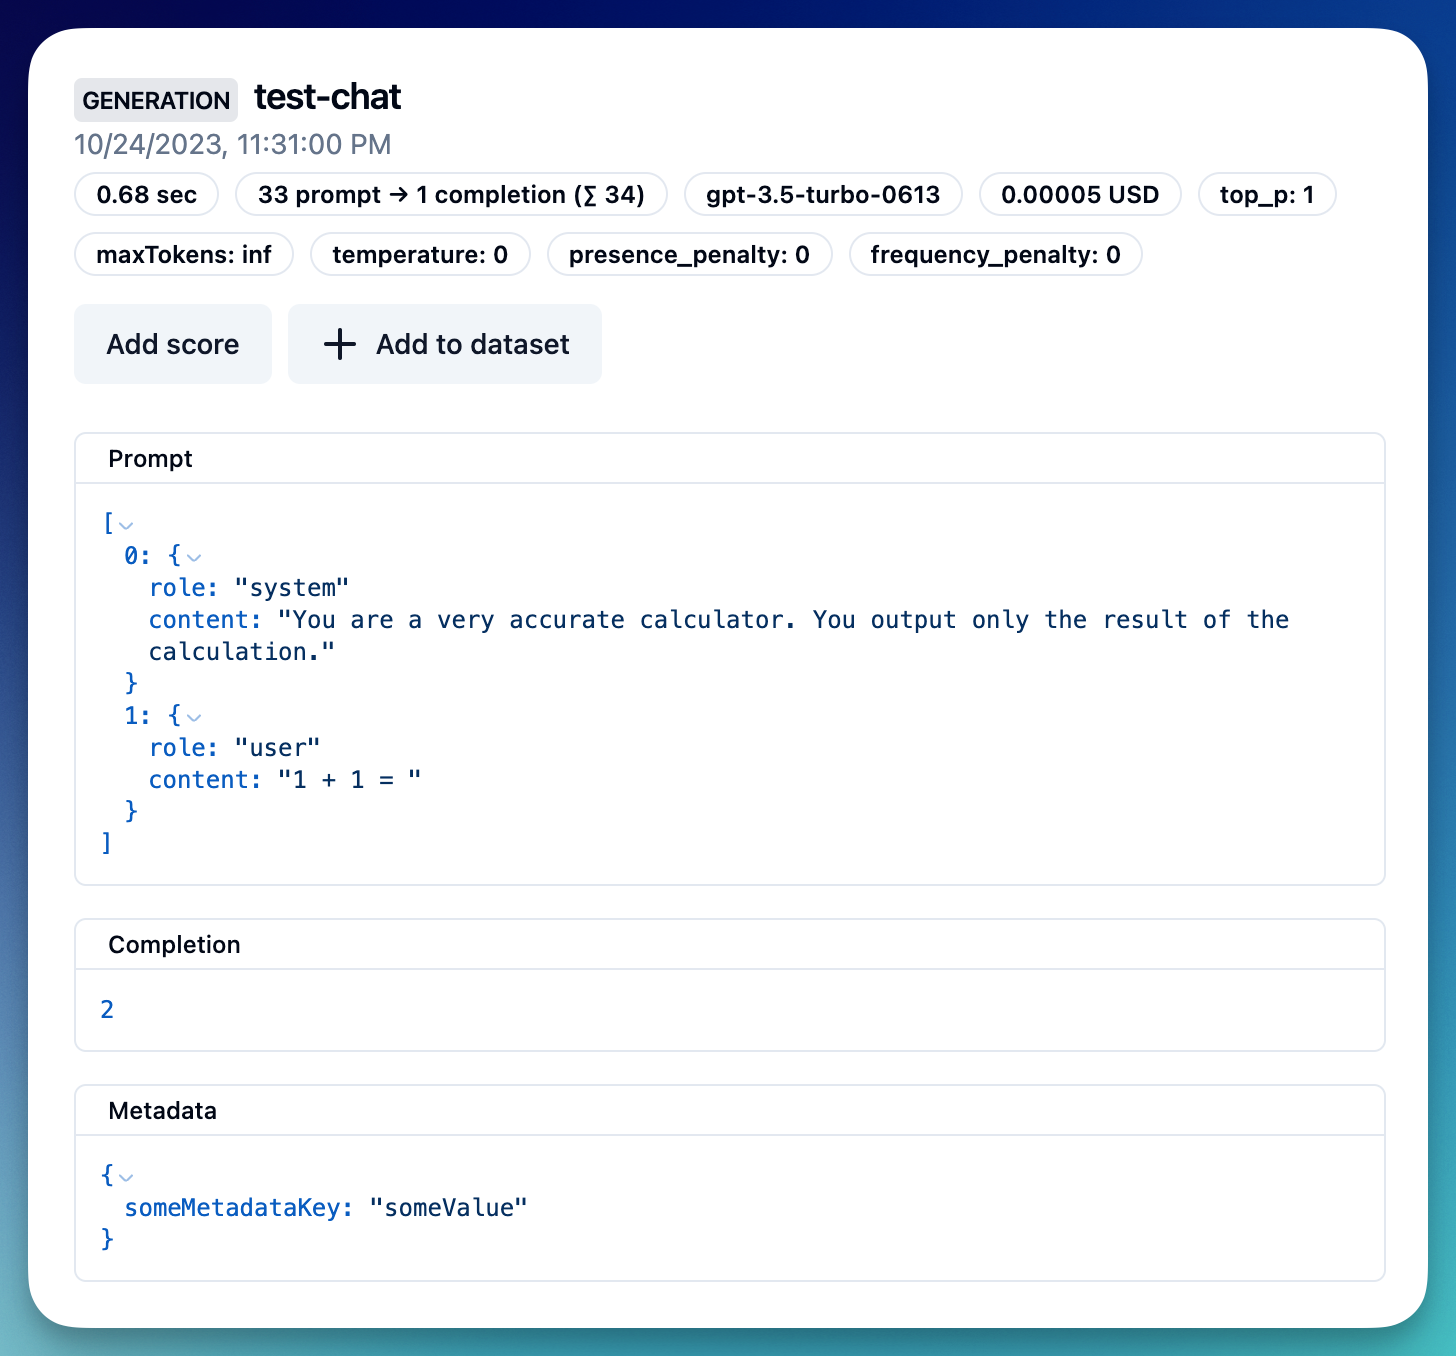
Chat completion
completion = openai.chat.completions.create(
  name="test-chat",
  model="gpt-3.5-turbo",
  messages=[
      {"role": "system", "content": "You are a very accurate calculator. You output only the result of the calculation."},
      {"role": "user", "content": "1 + 1 = "}],
  temperature=0,
  metadata={"someMetadataKey": "someValue"},
)
Streaming
Simple example using the OpenAI streaming functionality.
completion = openai.chat.completions.create(
  name="test-chat",
  model="gpt-3.5-turbo",
  messages=[
      {"role": "system", "content": "You are a professional comedian."},
      {"role": "user", "content": "Tell me a joke."}],
  temperature=0,
  metadata={"someMetadataKey": "someValue"},
  stream=True
)

for chunk in completion:
  print(chunk.choices[0].delta.content, end="")
Sure, here's one for you:
Why don't scientists trust atoms?
Because they make up everything!NoneAsync support
Simple example using the OpenAI async client. It takes the Langfuse configurations either from the environment variables or from the attributes on the openai module.
from langfuse.openai import AsyncOpenAI

async_client = AsyncOpenAI()
completion = await async_client.chat.completions.create(
name="test-chat",
model="gpt-3.5-turbo",
messages=[
{"role": "system", "content": "You are a very accurate calculator. You output only the result of the calculation."},
{"role": "user", "content": "1 + 100 = "}],
temperature=0,
metadata={"someMetadataKey": "someValue"},
)Functions
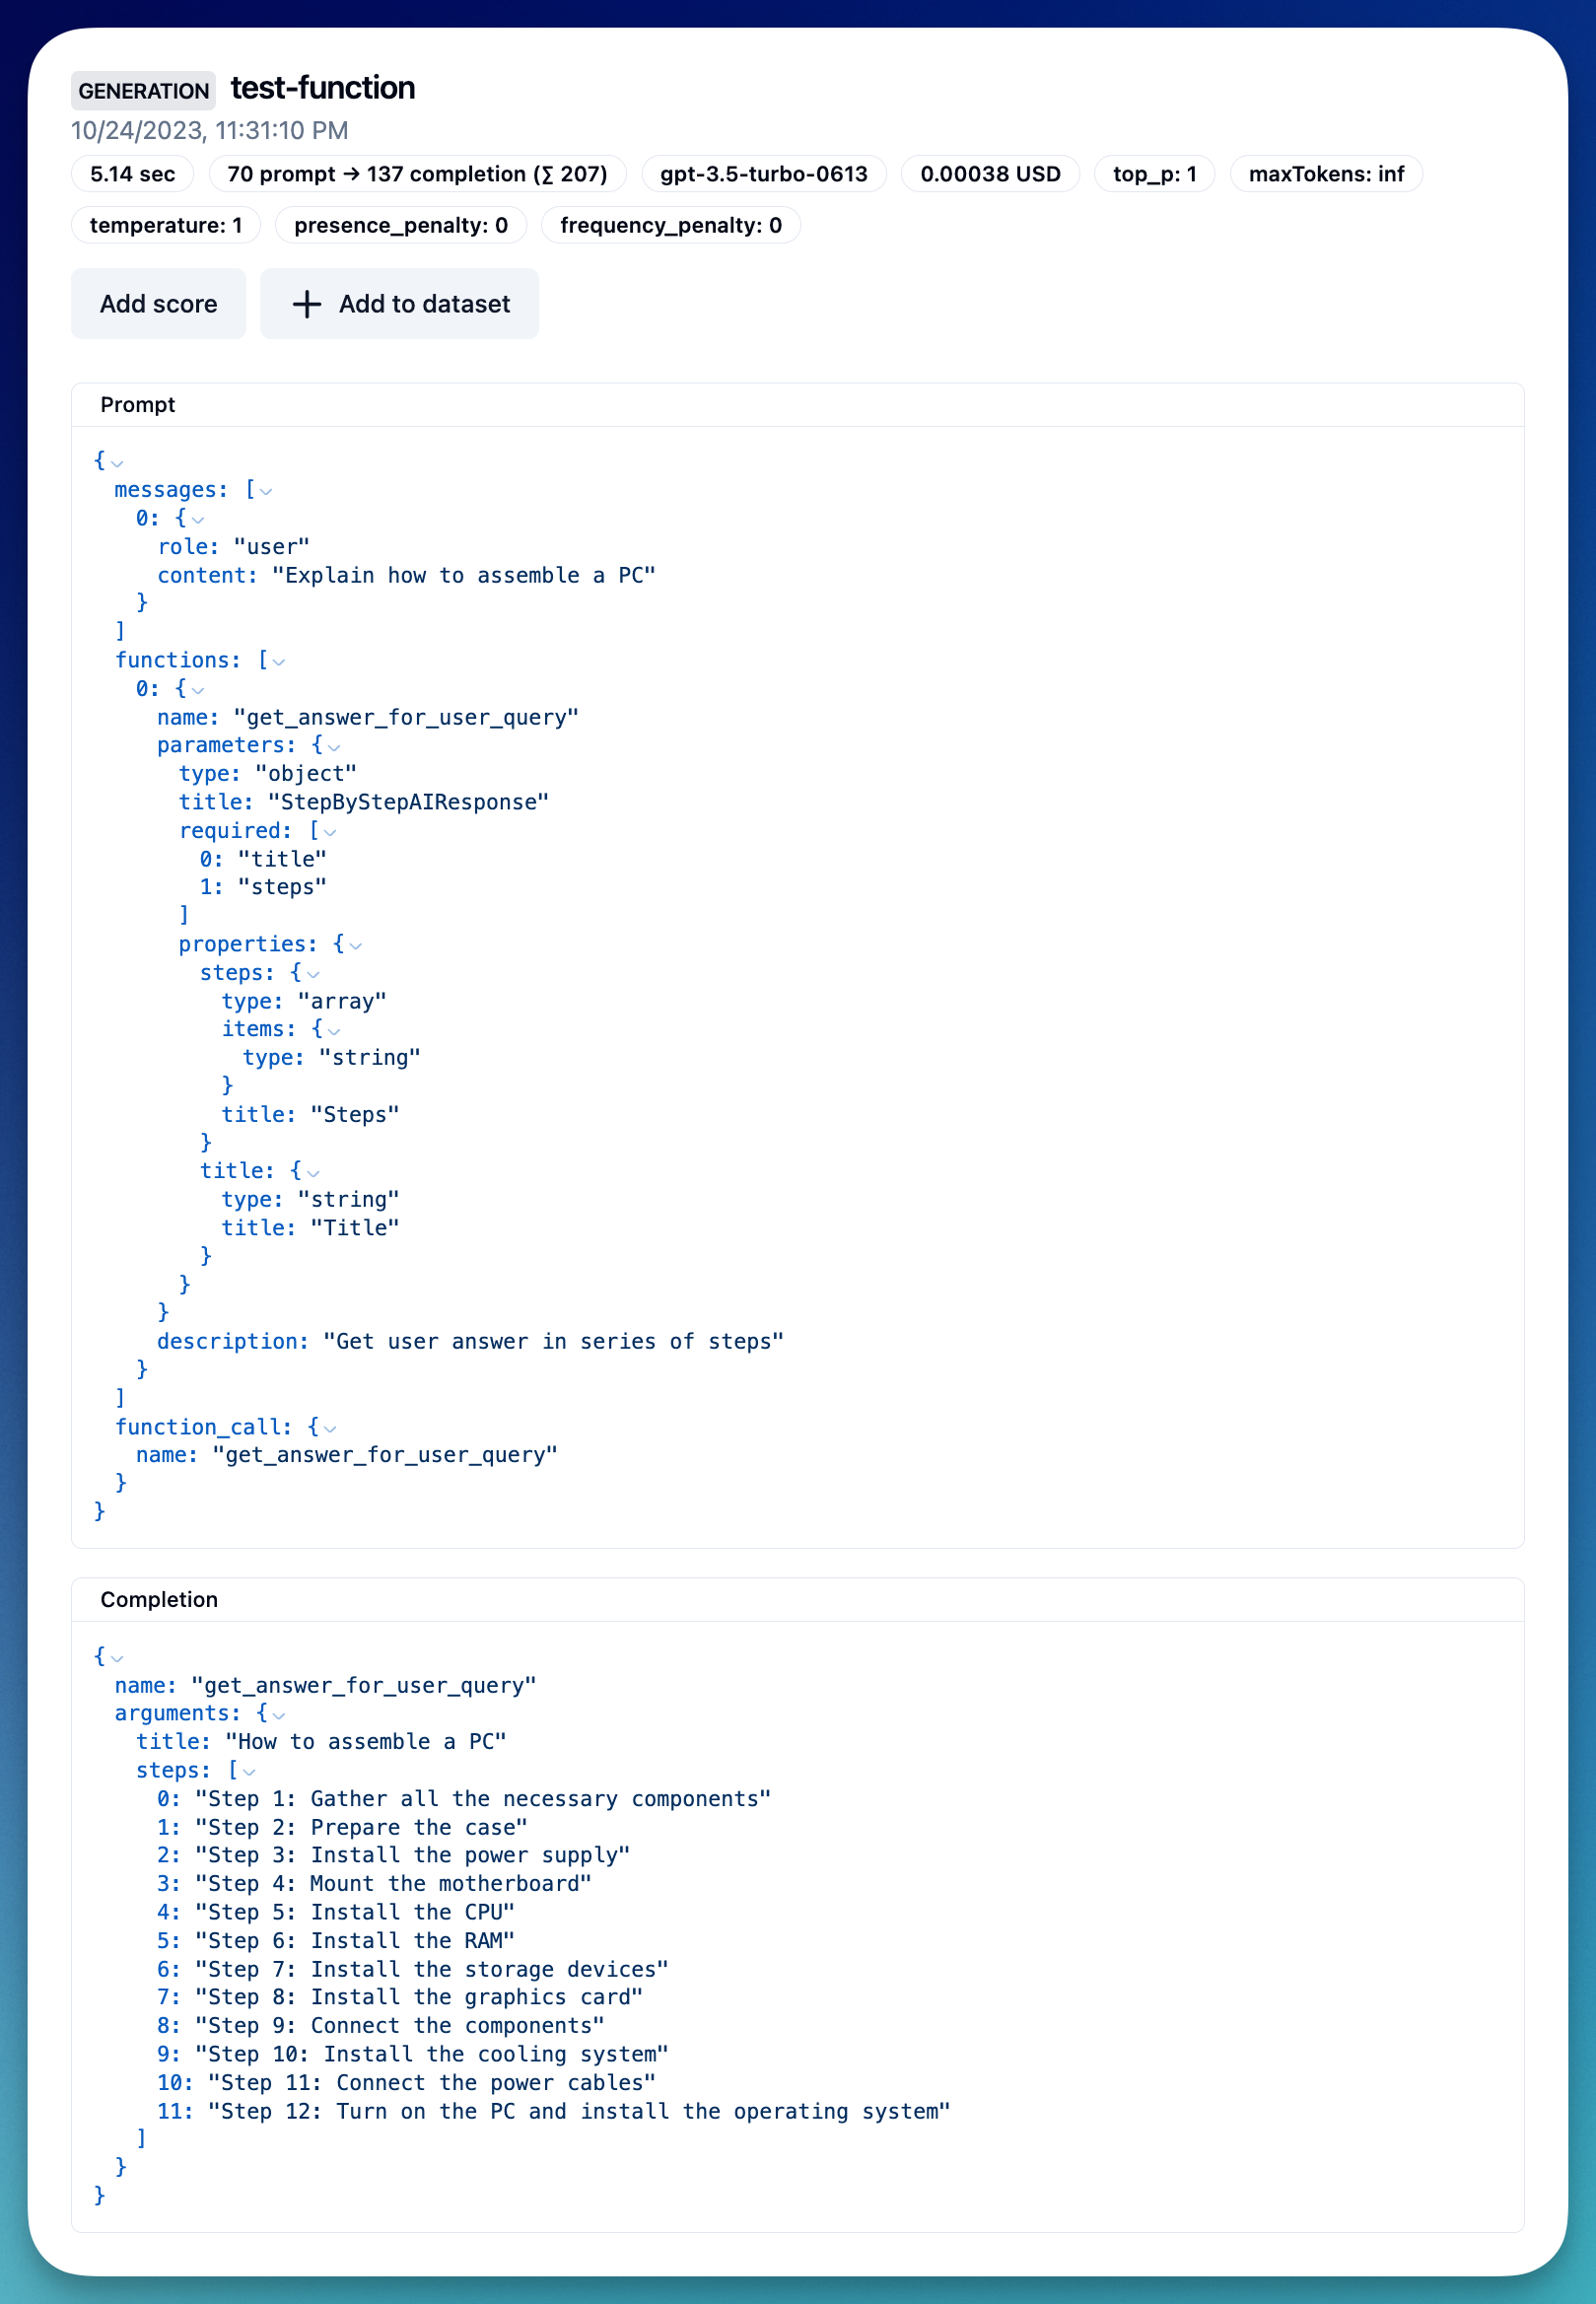
Simple example using Pydantic to generate the function schema.
%pip install pydantic --upgradefrom typing import List
from pydantic import BaseModel
class StepByStepAIResponse(BaseModel):
title: str
steps: List[str]
schema = StepByStepAIResponse.schema() # returns a dict like JSON schemaimport json
response = openai.chat.completions.create(
name="test-function",
model="gpt-3.5-turbo-0613",
messages=[
{"role": "user", "content": "Explain how to assemble a PC"}
],
functions=[
{
"name": "get_answer_for_user_query",
"description": "Get user answer in series of steps",
"parameters": StepByStepAIResponse.schema()
}
],
function_call={"name": "get_answer_for_user_query"}
)
output = json.loads(response.choices[0].message.function_call.arguments)4. Debug & measure in Langfuse
Go to https://cloud.langfuse.com (opens in a new tab) or your own instance
Dashboard

List of generations

Chat completion

Function

5. Track OpenAI errors
Langfuse automatically monitors OpenAI errors.
# Cause an error by attempting to use a host that does not exist.
openai.base_url = "https://example.com"

country = openai.chat.completions.create(
  name="will-error",
  model="gpt-3.5-turbo",
  messages=[
      {"role": "user", "content": "How are you?"}],
)
Throws error 👆

# Reset
openai.api_base = "https://api.openai.com/v1"
5. Group multiple generations into a single trace
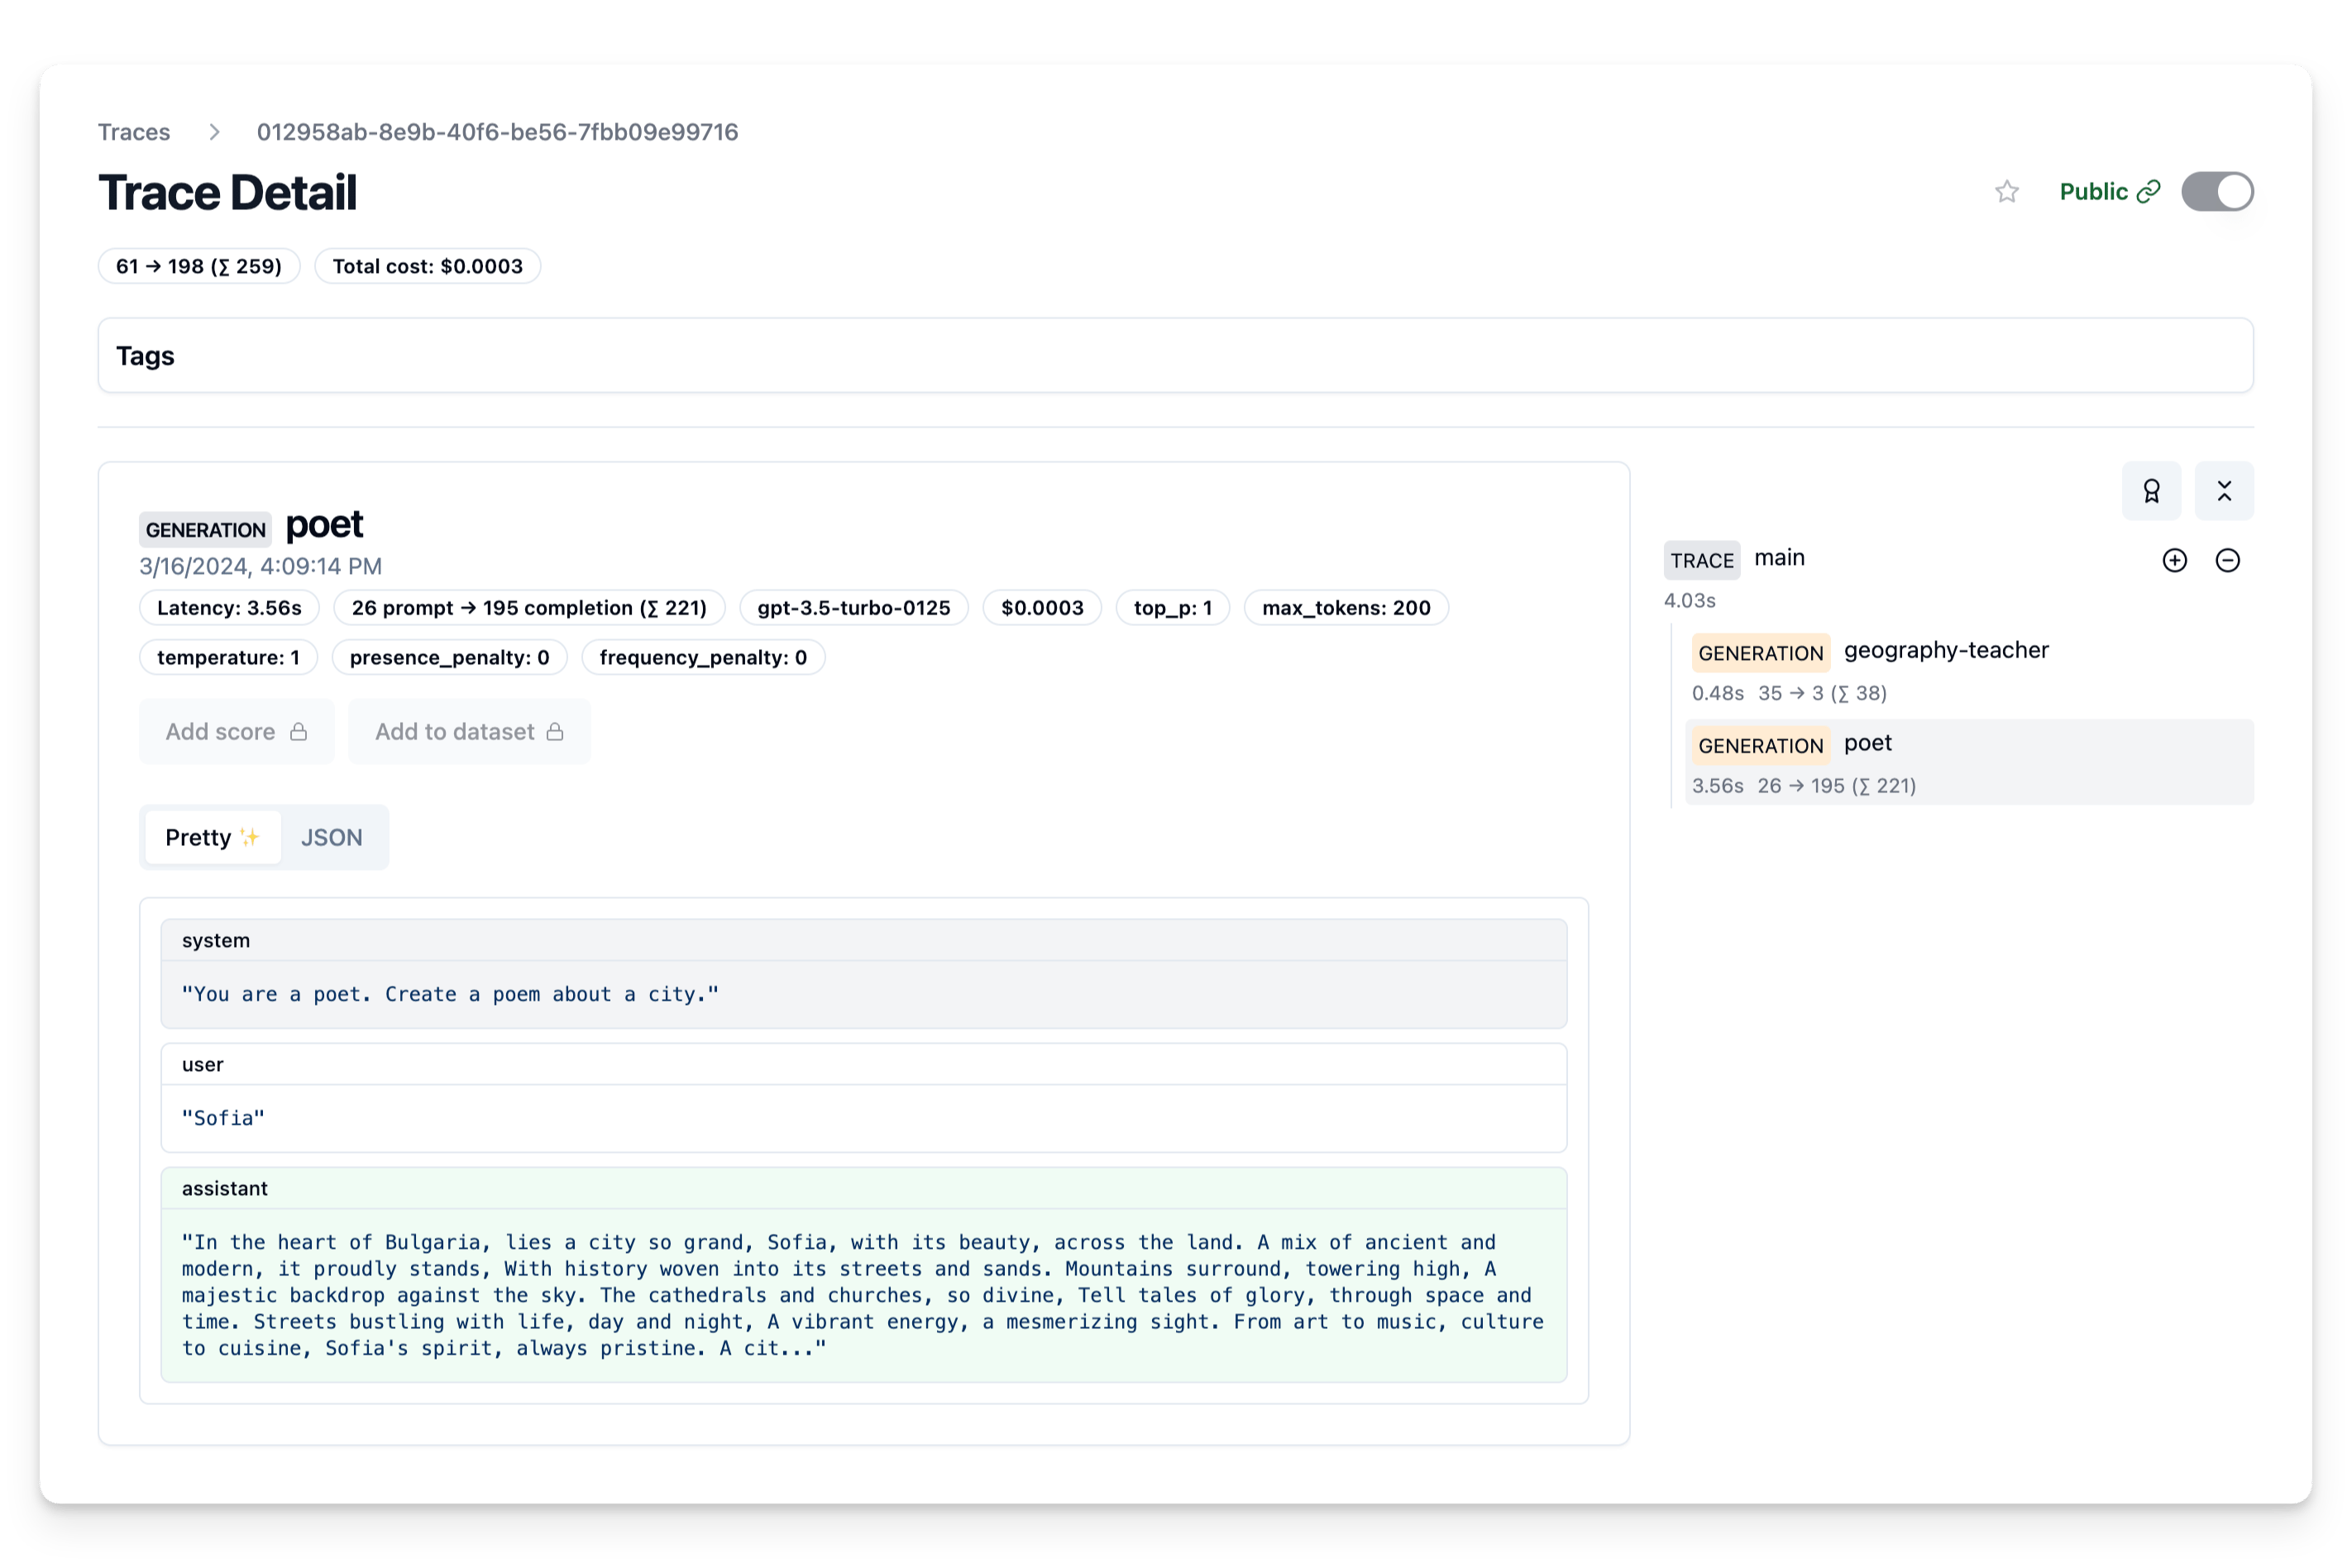
Many applications require more than one OpenAI call. In Langfuse, all LLM calls of a single API invocation (or conversation thread) can be grouped into the same trace.
There are 2 options: (1) pass a trace_id (own or random string) or (2) create a trace with the Langfuse SDK.
Simple: trace_id as string
To get started, you can just add an identifier from your own application (e.g., conversation-id) to the openai calls – or create a random id.
# create random trace_id
# could also use existing id from your application, e.g. conversation id
from uuid import uuid4
trace_id = str(uuid4())

# create multiple completions, pass trace_id to each

country = "Bulgaria"

capital = openai.chat.completions.create(
  name="geography-teacher",
  model="gpt-3.5-turbo",
  messages=[
      {"role": "system", "content": "You are a Geography teacher helping students learn the capitals of countries. Output only the capital when being asked."},
      {"role": "user", "content": country}],
  temperature=0,
  trace_id=trace_id
).choices[0].message.content

poem = openai.chat.completions.create(
  name="poet",
  model="gpt-3.5-turbo",
  messages=[
      {"role": "system", "content": "You are a poet. Create a poem about a city."},
      {"role": "user", "content": capital}],
  temperature=1,
  max_tokens=200,
  trace_id=trace_id
).choices[0].message.content
Fully featured: create trace via SDK
The trace is a core object in Langfuse and you can add rich metadata to it. See Python SDK docs (opens in a new tab) for full documentation on this.
Some of the functionality enabled by custom traces:
- custom name to identify a specific trace-type
- user-level tracking
- experiment tracking via versions and releases
- custom metadata
from langfuse import Langfuse
from langfuse.model import CreateTrace

# initialize SDK
langfuse = Langfuse()

# create trace and add params
trace = langfuse.trace(CreateTrace(
    # optional, if you want to use your own id
    # id = "my-trace-id",

    name = "country-poems",
    userId = "user@example.com",
    metadata = {
        "env": "development",
    },
    release = "v0.0.21"
))

# get traceid to pass to openai calls
trace_id = trace.id

# create multiple completions, pass trace_id to each

country = "Bulgaria"

capital = openai.chat.completions.create(
  name="geography-teacher",
  model="gpt-3.5-turbo",
  messages=[
      {"role": "system", "content": "You are a Geography teacher helping students learn the capitals of countries. Output only the capital when being asked."},
      {"role": "user", "content": country}],
  temperature=0,
  trace_id=trace_id
).choices[0].message.content

poem = openai.chat.completions.create(
  name="poet",
  model="gpt-3.5-turbo",
  messages=[
      {"role": "system", "content": "You are a poet. Create a poem about a city."},
      {"role": "user", "content": capital}],
  temperature=1,
  max_tokens=200,
  trace_id=trace_id
).choices[0].message.content
6. Add scores
You can also add scores (opens in a new tab) to the trace, to e.g. record user feedback or some other evaluation. Scores are used throughout Langfuse to filter traces and on the dashboard. See the docs on scores for more details.
The score is associated to the trace using the trace_id (see previous step).
from langfuse import Langfuse
from langfuse.model import InitialScore

langfuse = Langfuse()

langfuse.score(InitialScore(
    traceId=trace_id,
    name="my-score-name",
    value=1
));
Troubleshooting
Shutdown behavior
The Langfuse SDK executes network requests in the background on a separate thread for better performance of your application. This can lead to lost events in short lived environments like AWS Lambda functions when the Python process is terminated before the SDK sent all events to the Langfuse backend.
To avoid this, ensure that the openai.flush_langfuse() function is called before termination. This method is blocking as it awaits all requests to be completed.
openai.flush_langfuse()